
How to
Login to edit the website using this link https://www.transitiontooting.org/wp-login.php?
You will see the WordPress Dashboard in your web browser. This is where the fun begins!
Never add any Pages. We only use Posts in this website. Only the top level pages (What we do, etc) are Pages.
Garry
Most of the site is automatically generated based on the tags on each post – wrong tags messes shizzle -up!!
Here’s How to;
- Find my project post to edit
- Undo a mistake.
- Edit an existing page/post
- How does the Block editor work
- Add a link
- Create a new post
- Move Blocks around
- Change the order of the Active Projects
- Archive a no longer active project
- Add a project to the ‘Things we’ve done’ list
- Add an Allied project
- Add a sub menu
- See a list of all the tags and categories.
- Add jump to specific part of a page/post
Top tips
When you are typing in WordPress if you want to create a new line of text
Like this. You need to press the SHIFT key + the RETURN key. This creates a new line.
If you just hit the RETURN key you create a new paragraph, just like this puppy!
Can’t see the edit you just made on the live site?
You either did not save (Update) or you need to clear your web browser cache. This is how and why to clear your cache
Find my project post to edit
There are two paths to follow….
Either navigate to the post on the website. When you find the post/page you want.
Click on the ‘Edit Post’ button at the very top of the screen.
OR you can search for it.
Go to the Dashboard
Then click on ‘Posts’ and use the Search to find what you are looking for.
Edit my page/post
NB You will only ever edit and create ‘Posts’ (NOT Pages). Only the top level pages (Like What we do, Contacts, etc) of the site are really Pages. Any hooo…
Only the items in the pink boxes are of interest.
If your page already exists then click on the ‘House’ button at the top of the screen. The site will load and you can navigate to your page/post.
When you have finished editing you must click the ‘Update‘ button to save. Otherwise all your edits will be lost.
How, do I undo a mistake
Easy use the keyboard short-cut for undo; on a
PC is Ctrl + Z,
Mac is Command + Z
If this does not take you far enough back (you can Ctrl+Z several times). Then you can look back at *all* the ‘revisions’ that WordPress automatically saves . Here’s a video that explains how to undo.
How do a create a new post
Click on the ‘+ New’ button
Click on the ‘Post’ button

A new blank Post will open – see below
Start by adding a Title
Then add the text, images, video, etc
Learn more about Blocks of content
Don’t forget to hit the ‘Update’ button when you are done!
See a list of all the tags and categories
Go to the Dashboard view.
Click on ‘Posts’
Then click on ‘Tags’.
You will see a list of all the tags used on this website. You can search them too!
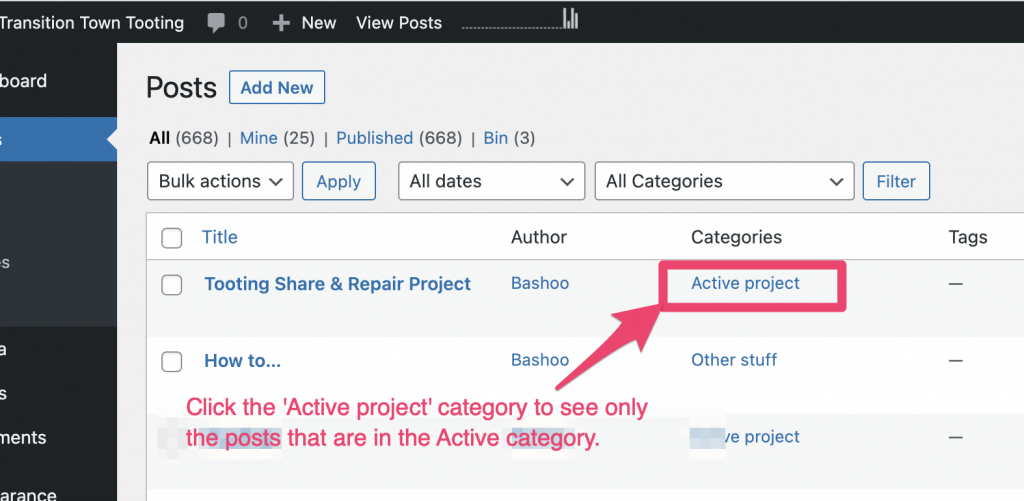
Change the order of the Active Projects
The order the active projects appear is dictated by the date that WordPress thinks the Post was created. So we change the date of the post and, relative to the other active project posts, a post will move up or down the order. NB this date is not displayed to the user (until the post is no longer active).
- Go to the Posts list
- Click on the Active project category – So only the Active projects are displayed.
- The Posts are displayed in date order – the same as on the live website.
- Click on the ‘Quick Edit’ link of the post you want to move
- Change the date to move it relative to the other active projects
- Click ‘Update’
- You will need to refresh the browser page to see the new world order that you have created.
Archive a no longer active project
To change where a post (project page) appears you just change its’ Category.
Open the Post you want to change.
With the ‘Post’ tab selected (on the top right of the edit screen).
Scroll down to the ‘Categories’ section.
Click on the ‘Active project’ box to un-select it.
Press the ‘Update’ button to save your changes!

Add a project to the ‘Things we’ve done’ list
To change where a post (project page) appears you just change its’ Category.
Open the Post you want to change.
With the ‘Post’ tab selected (on the top right of the edit screen).
Scroll down to the ‘Categories’ section.
Click on the ‘Herstory’ box to select it.
Press the ‘Update’ button to save your changes!

Add an Allied project
- Add a new Page
- Type in the Title – the name of the project
- Add a Cover block and add an image to this block (this gives you the wide image- like Fishponds page.)
- The layout from here on is up to you. I used a columns block (2 columns) to give the layout on the Fishponds page.
- Critical
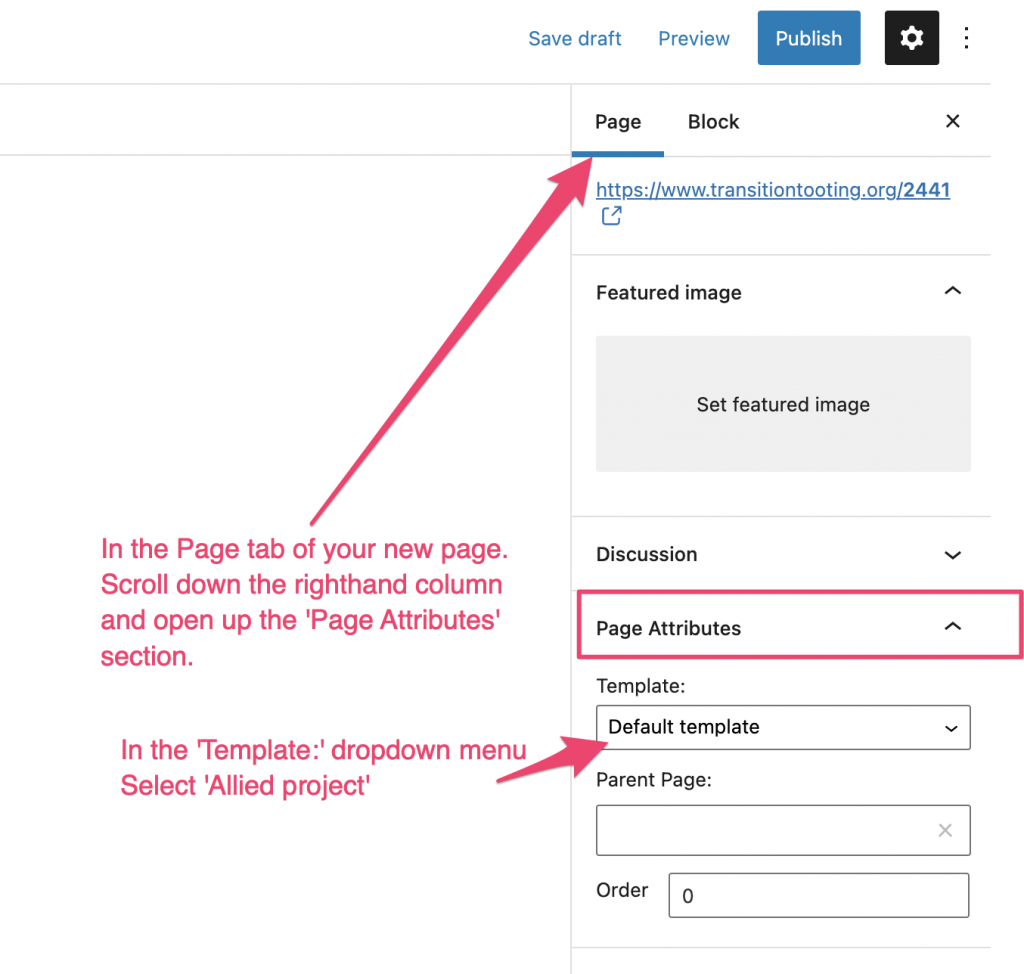
- In the ‘Page’ tab of your new page. (see image below). Scroll down the righthand column and open up the ‘Page Attributes’ section.
- In the ‘Template:’ dropdown menu
- Select ‘Allied project’
- Click the ‘Publish’ button to save your changes.
This displays the page with just the Footer from the TTT site.
Add a sub menu

This is not a simple process. Question whether you can achieve the desired effect using a single page and anchor points to specific parts of the page – just like this one.
Garry
Before you start create all the Posts that you want to link together. On a piece of paper write out the structure you want. Use post titles that will make sense to the visitor – not just to you!
You are going to need to login to the site as a site administrator (contact garry@smallmouse.com or Hilary for this). With great power comes great responsibility – please be very careful in there!
This is a lovely tutorial – maybe better than mine – please read it
https://pixelgrade.com/docs/header-and-footer/different-menus-different-pages/
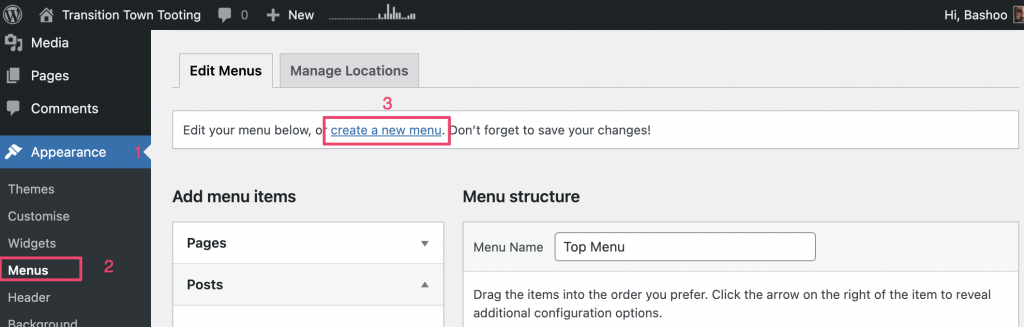
First create a new menu
Appearance/Menus: click ‘create a new menu.
Type in a useful (brief and descriptive) name for your new menu.
Leave the Settings boxes unchecked
Click ‘Create menu button.
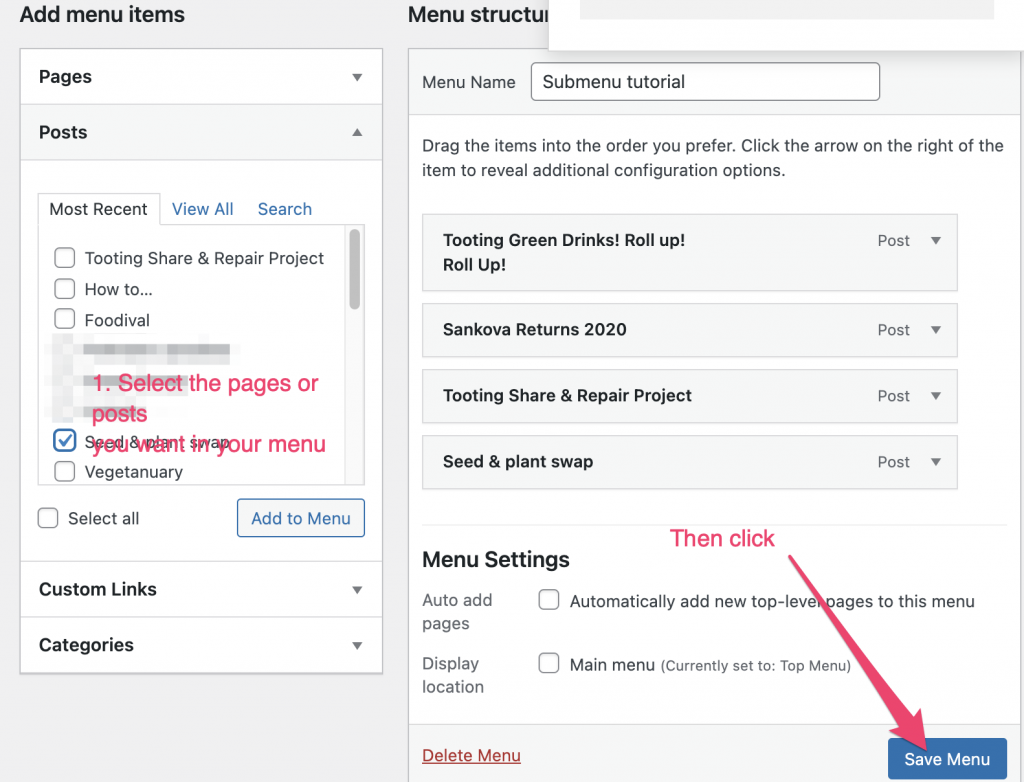
Now add the posts you want in your menu.
Select the posts and click the ‘Add to Menu’ button.
When you are done click the ‘Save Menu‘ button.
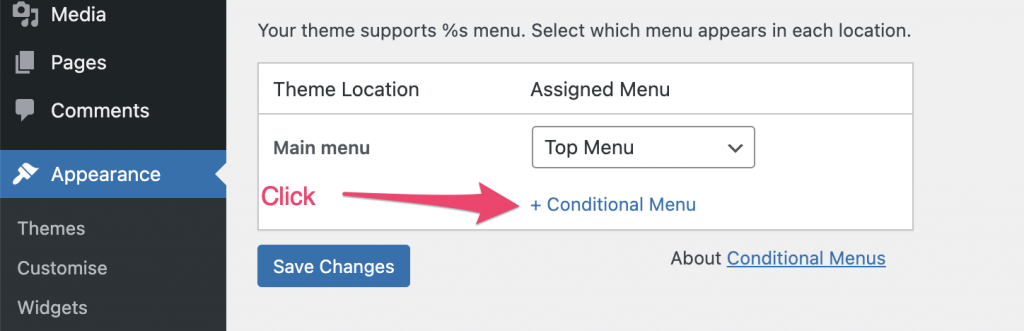
https://themify.me/conditional-menus
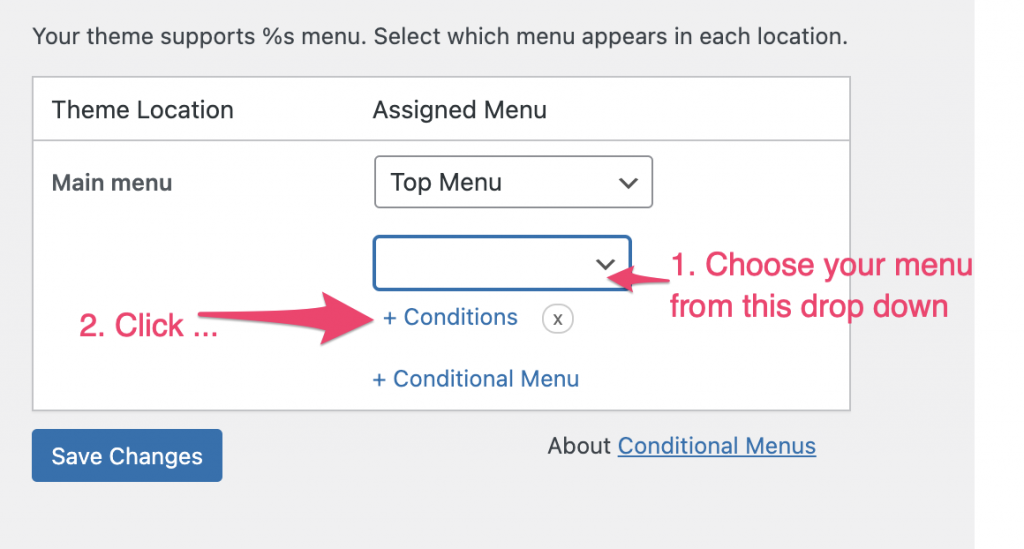
Click on the ‘+ Conditions‘ then click the ‘Pages’ tab and check the box next to the page you want to add this menu too.
Save your changes!!!
Check your page and WTF it hasn’t changed. Yeah, there is one last thing… we need to change the page template to one with a top menu.
Change your page template to ‘Allied p with Menu’. To do this go to the page in edit view and change the Template in the ‘Page Attributes/Template:’ dropdown.
‘Update’ and you’re done.